Background
As many as 12% of patients seen in the emergency room are due to ankle injuries. Although nearly all of these patients will have an ankle X-ray, only approximately 15% are positive for an actual fracture. Differentiating an ankle sprain from an ankle fracture is important when it comes to the rehabilitation process. If an ankle is fractured, it is typically immobilized in order to let the bone heal. In a sprain however, brief periods of immobilization and/or crutch use may be necessary. The Ottawa Ankle Rules are a good way to make a clinical decision to help determine the need for diagnostic imaging after ankle and/or foot trauma.
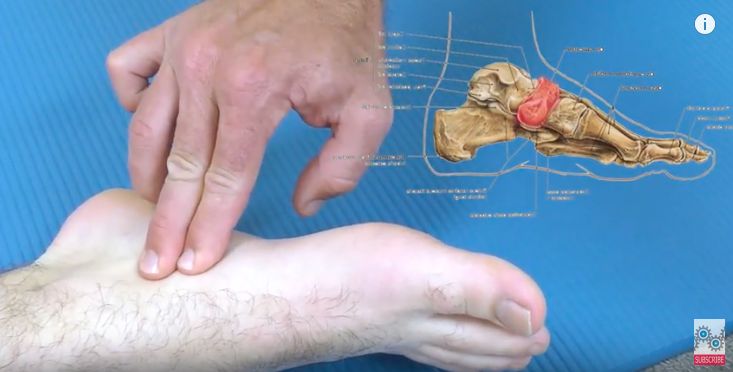
According to the Ottawa Ankle Rules, An ankle X-Ray is only required if there is any pain in the malleolar zone and:
- Bone tenderness at the posterior edge or tip of the lateral malleolus.
OR
- Bone tenderness at the posterior edge or tip of the medial malleolus.
OR
- And the inability to bear weight both immediately and in the emergency department for four steps
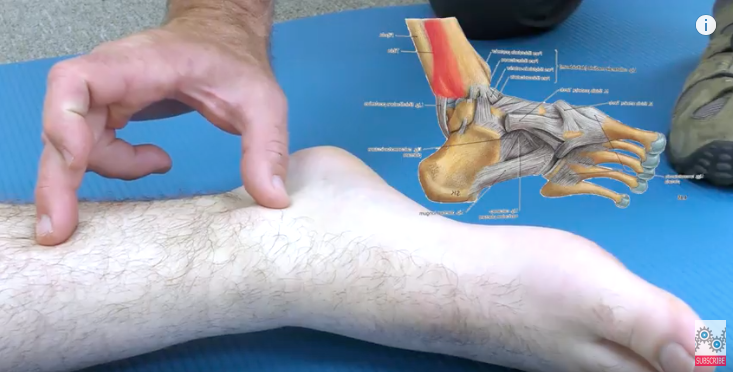
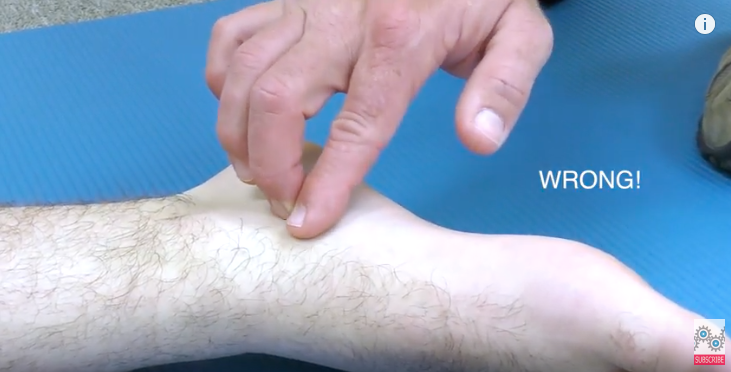
To palpate the lateral malleolus or outside ankle bone. Find the boney, knot-like structure, on the outside of the ankle. Palpate form the tip, then up to 6 centimeters along the posterior edge. Use light pressure to palpate.
Do not palpate below the outside ankle bone. All soft tissue structures here may be painful or sore from a strain and/or sprain.
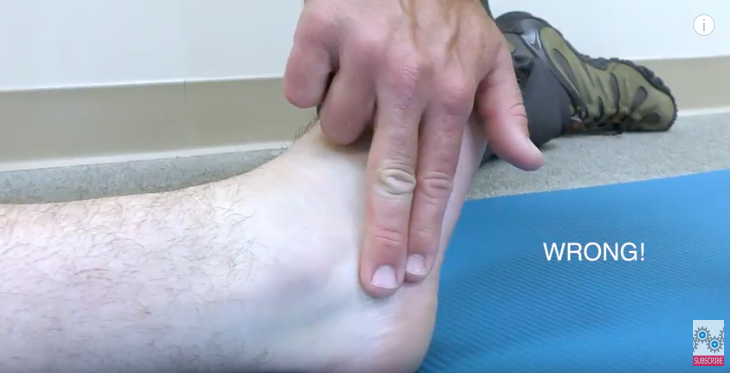
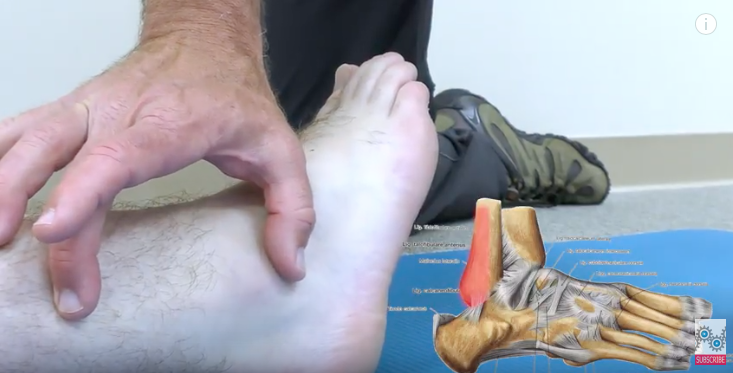
To palpate the medial malleolus or inside ankle bone. Fine the boney, knot-like structure, on the out inside of the ankle. Palpate form the tip, then up to 6 centimeters along the posterior edge. Again, use light pressure to palpate.
Do not palpate below the inside ankle bone. All soft tissue structures here may be painful or sore from a strain and/or sprain.
A foot X-Ray series is only required if there is any pain in the midfoot zone and:
- Bone tenderness at the base of the fifth metatarsal.
OR
- Bone tenderness at the navicular.
OR
- And the inability to bear weight both immediately and in the emergency department for four steps.
To palpate the fifth metatarsal, start just above the little toe, on the outside of the foot, and work up until you feel a little boney protrusion. This is the base of the fifth metatarsal.
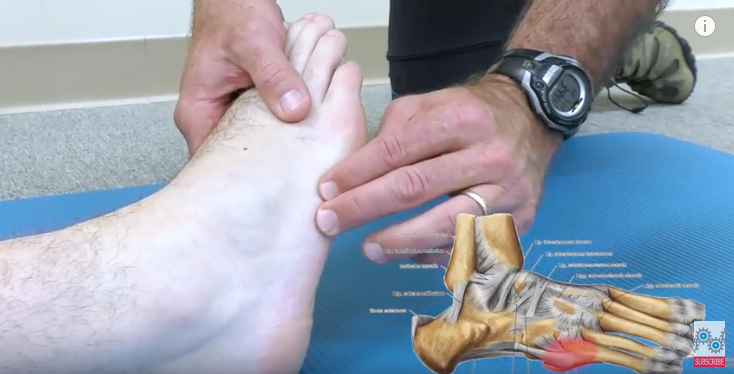
The navicular can be palpated on the inside of the foot right above the arch. Remember, use light pressure with all palpations.
More Information:
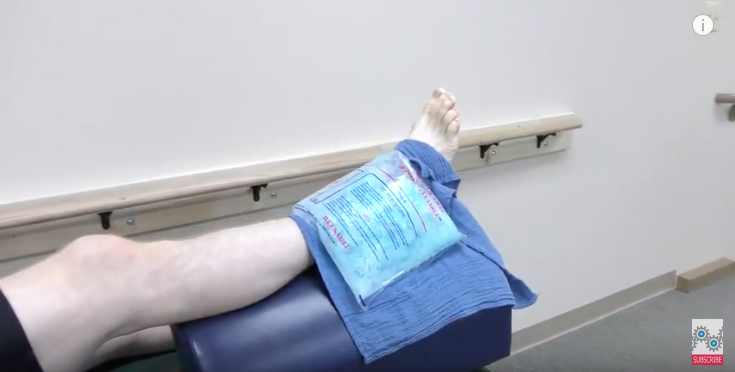
In the acute phase of tendonitis, ice is a great way to help reduce inflammation.
Ice Pack to Inflamed Ankle
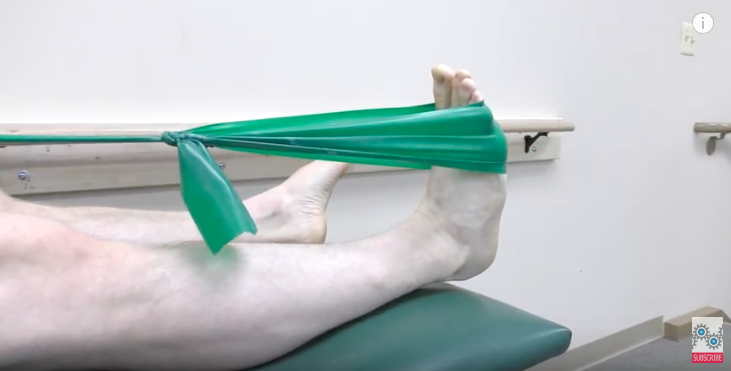
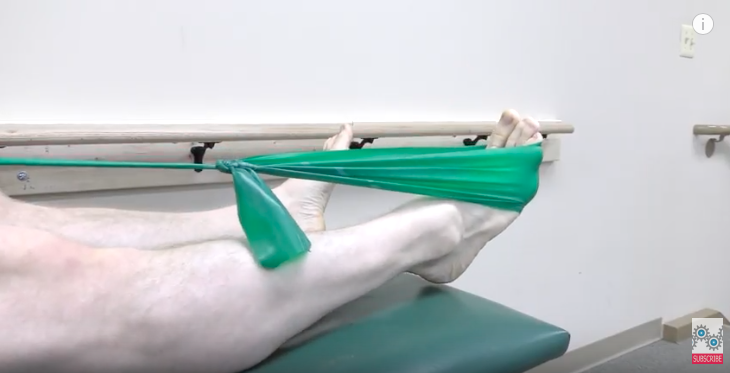
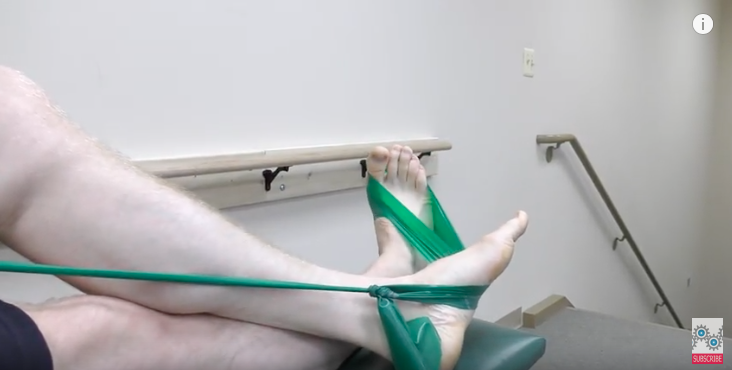
All exercises that we will show should be done in a pain-free range of motion. Start by placing your foot into a looped resistance band. Hold the other end of the band with both hands. Push the foot down, then slowly allow it to come back up. This motion is known as Ankle Plantarflexion. Build up to 3 sets of 10 repetitions.
Ankle Band Plantarflexion
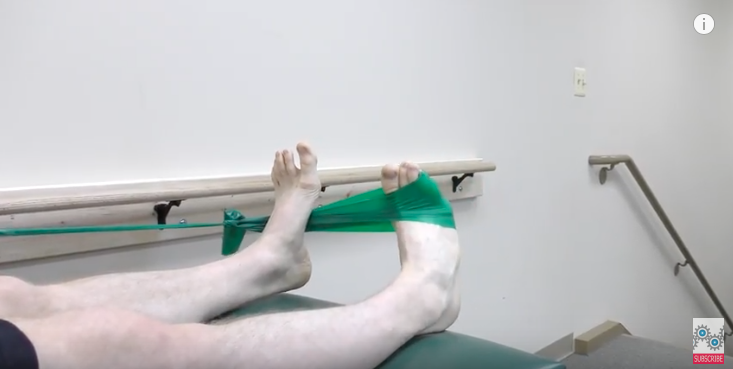
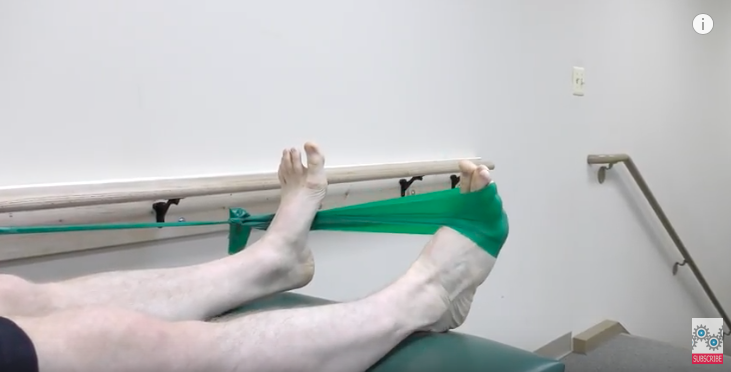
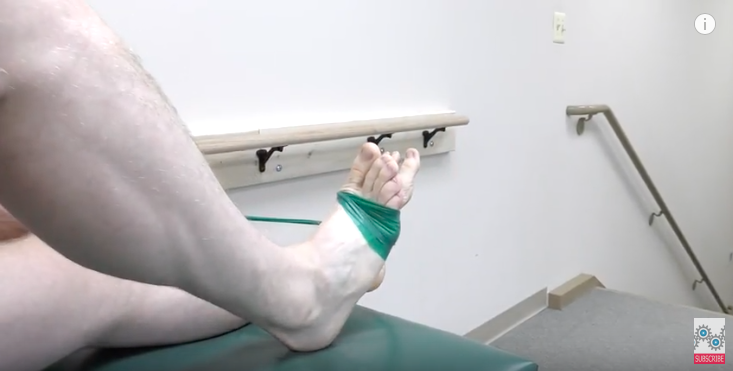
 If you need more resistance, pull harder on the band or get a thicker band and try again. Next, use your non-involved foot to hold the band to the side as you roll your involved outward. This is known as Ankle Eversion. Remember to allow the foot to slowly return to neutral. Build up to 3 sets of 10 repetitions.
Ankle Band Eversion
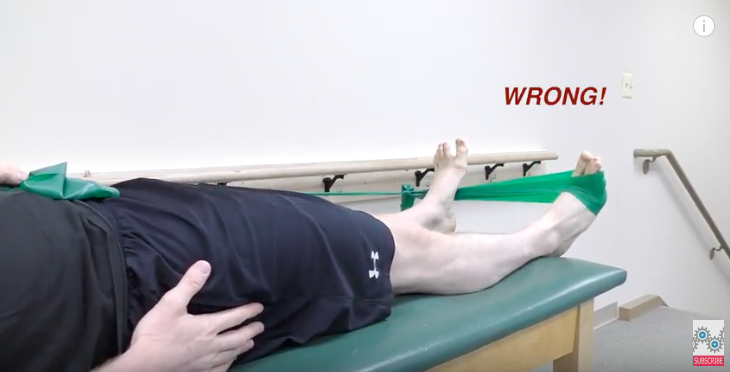
 Make sure all the motion comes from your ankle, not your hip or knee.
Incorrect Ankle Band Eversion
To perform Ankle Inversion, cross the non-involved ankle over the involved ankle and use the upper foot to hold the band. Now roll the ankle in and then slowly return to neutral. Build up to 3 sets of 10 repetitions.
Ankle Band Inversion

 Next, use the non-involved side to hold the band down as you pull up with the involved side. This is known as Ankle Dorsiflexion. You will have to bend the knee to get in the correct position. Build up to 3 sets of 10 repetitions.
Ankle Band Dorsiflexion

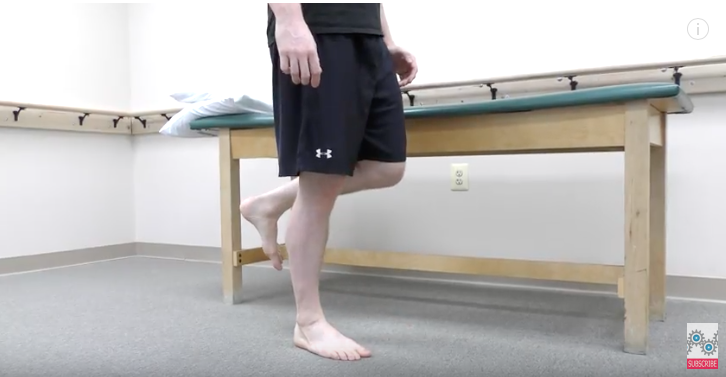
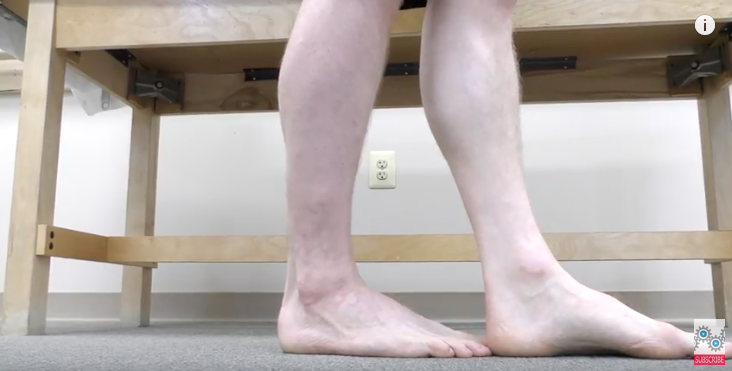
Single leg balance challenges all the muscles of the ankle and foot. Simply stand on the involved side holding your balance for 5-10 seconds. If you are at risk of falls, hold a stable object when attempting this exercise.
Single Leg Balance
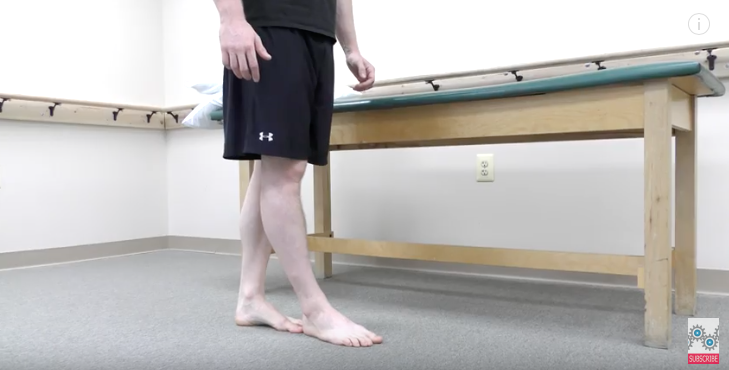
Tandem standing can also challenge the muscles of the ankle and foot. Place the non-involved side in front of the involved side and try to hold your balance for 5-10 seconds.
Tandem Balance - Non-Involved Foot in Front
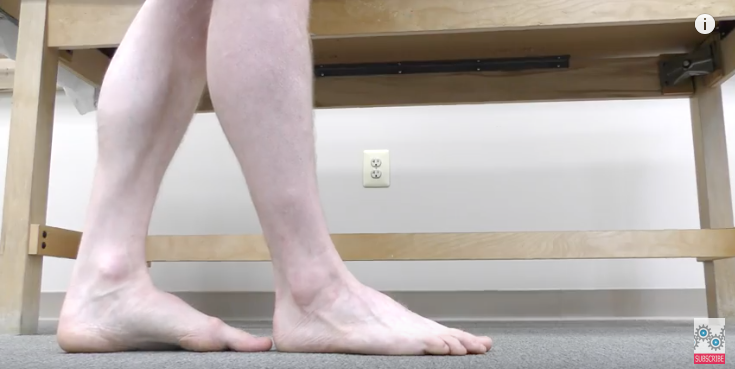
Now try it again, but this time place the non-involved side behind. If you are at risk of falls, hold a stable object when attempting this exercise. Try holding your balance for 5-10 seconds.
Tandem Balance - Involved Foot in Front
Next, try the single leg balance on a soft surface. Again, hold a stable object if you are feeling unstable. Try holding your balance for 5-10 seconds.
Single Leg Balance on Foam

More Information:
Sprained Ankle? Learn How to Treat and Prevent